How to make a Divan
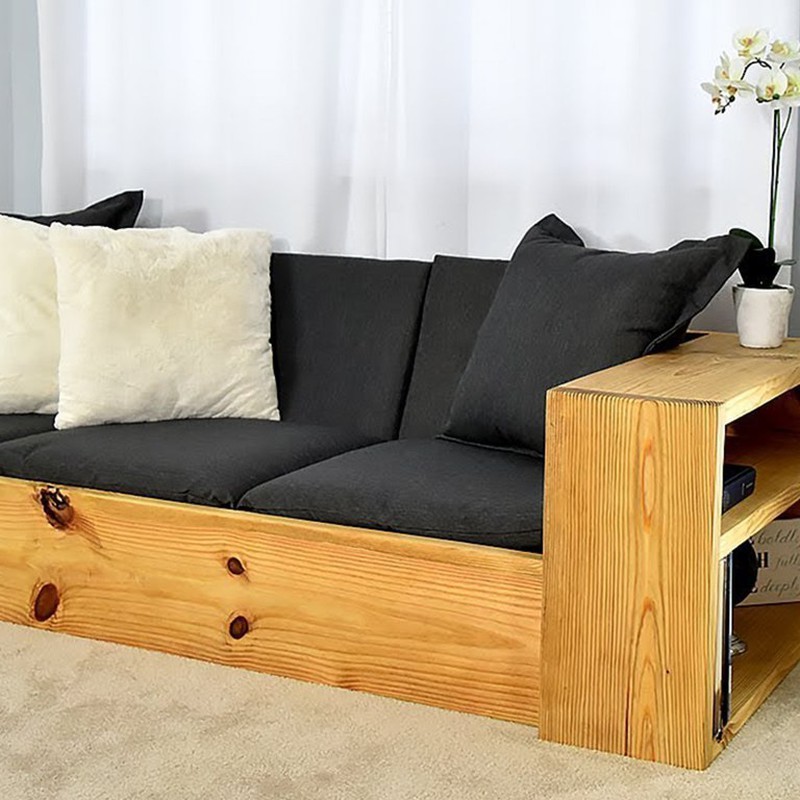
The divan is a comfortable and original piece of furniture that we all love to have at home. If you feel that right in your living room or garden you have the ideal space to place one, you can do it by yourself in simple steps and few materials. So take note, because we will give you these Poolfunstore tips on how to make your own daybed.

It is always very helpful to have a daybed in a reserved space in the home or office. And we can put our original touch to make it look like a perfect accessory in that special place where we are going to place it, and also, depending on the model we have the possibility of storing items inside.
Furniture like these that complement our home, we can also easily acquire them in an online store, such as in our Brycus Illescas store, but if you have decided to let yourself be carried away by your creativity and make one by yourself, then pay attention to these PoolFunStore tips.
Regarding tools, have the following on handKey Materials
If your divan will be made of wood, you will need a smooth pine plank of at least about 18 mm, as well as a wooden slat and foam rubber as primary materials. Additionally, you must have:
● Wood glue
● Colorless varnish
● Upholstery fabrics
● Non-slip feet
● 8mm staples
● 4x40mm lag screws
● Filler varnish
We will start by covering the foam rubber mattress with the fabric of our preference or according to the colors and decoration existing in the place where the couch will be located, and we will use non-slip feet to avoid scratching the floor. Regarding the finish, it goes with the taste of each person, but it is recommended to use a colorless varnish to protect the wood and to leave it with a certain vintage style showing off its original color.
● Screwdriver drill
● Sierra
● Stapler
● Foam roller
● Bucket
● Blade for curved cuts in wood
● Wood bit
● PZ2 tip
● Nails
Last step
Once you have gathered all the materials and tools that you can buy at the Brycus Illescas store or online, we turn on the button for our creativity and start with the step by step:
The first thing to do is start shaping the side pieces. With the help of a ruler or the wooden strip we draw two straight lines and then point to the highest point of the curve. With the help of nails and a flexible ribbon we can mark the warped line, and then, with the jigsaw and the wood cutting blade, we can shape the divan boards.
In this step it is time to draw the handles. With a drill bit-shovel we make a hole in each of them of Ø 36 mm and then empty the area with the jigsaw and the blade of straight cuts in wood.
In the third step it is already necessary to join the pieces together, with the help of a drill and a wood drill that will have the diameter according to the size of the screws that we are going to use. Then, we put the carpenter's glue on the wooden slats so that they are fixed on the boards. We cannot forget to reinforce the fasteners by inserting lag screws with the corresponding screwdriver bit.
Here we can already assemble the entire structure. With the wooden glue we can be securing the pieces and the fasteners with lag screws. Once we have this controlled we can start working with the finish by first applying the filler varnish and when drying, the colorless with a palette.
At this point the varnish will dry and we can prepare the top of our couch. Simultaneously, the points that fix the two lateral pieces must be drilled. To prevent them from moving, secure them with clamps. Then, these pieces will be joined with the master tables that will be fastened with adhesives and lag screws.
It is time to put the foam rubber mattress on the top, and fix it with staples. After this, we cover it tightly with a cloth and re-staple it.
Place the non-slip feet at the bottom of the frame, and to finish the cover corresponding to the divan fitting properly.
And ready! Although in some online store they look great, surely you will not like it as much as the one that has come out of your own hands. !! Congratulations!! Your daybed is now ready to look amazing and be useful where you need it most.


Our customers trust us
Opinions of our clients
Receive our news